pxDoc - Papyrus Integration
- Installation
- Quick start
- Use the pxDoc common libs in your generator
- Find the project on GitLab
- Get support on pxDoc
This enabler provides full pxDoc capabilities to the Papyrus UML2 modeling environment .
Installation
First make sure that XText v2.11 and pxDoc are already installed (if this is not the case: install pxDoc).
To install the enabler:
- In Eclipse, Choose Help -> Install New Software... from the menu bar and Add....
- Insert the http://www.pxdoc.fr/updates/pxdoc-uml-papyrus/releases URL.
- Select the pxDoc Papyrus Integration from the category pxDoc Integrations and complete the wizard by clicking the Next button until you can click Finish.
- After a quick download and a restart of Eclipse, the pxDoc Papyrus enabler is ready to use.
You can also test the nightly built: update site nightly built
Quick start
Browse the examples
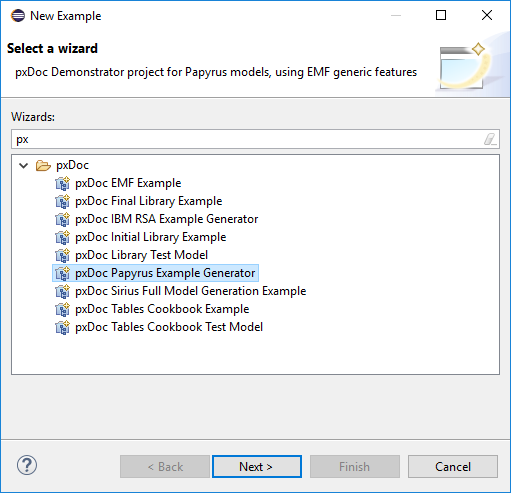
Once installed, you can import the UML Generic example dedicated to Papyrus, and many other pxDoc sample projects.:
Then File -> New -> Example...

Note: The sample generator is included as plugin in the enabler, so you can launch the generation directly from a model, without installing the examples.
Initialize a new pxDoc generator
See Project creation for more details on pxDoc projects creation.
First create an empty pxDoc project, with File -> New -> Project... and select the pxDoc Project wizard.
In the second page of the wizard (see screenshot below), select the Papyrus enabler. If you do not want the common libraries (common modules and associated means) to be automatically imported in your project, un-check the checkbox.
If you do not have a Word stylesheet (.dotx file) available, you can select the one deployed in the EMF Generic Generator

Click on finish.
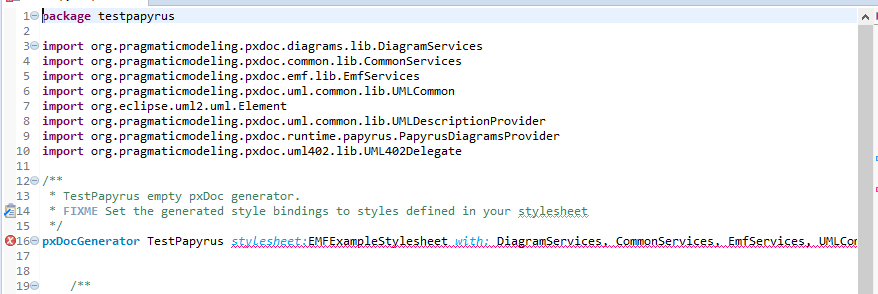
First, the pxDoc project itself is created and the .pxdoc file opens. You may notice errors in this project during few seconds:

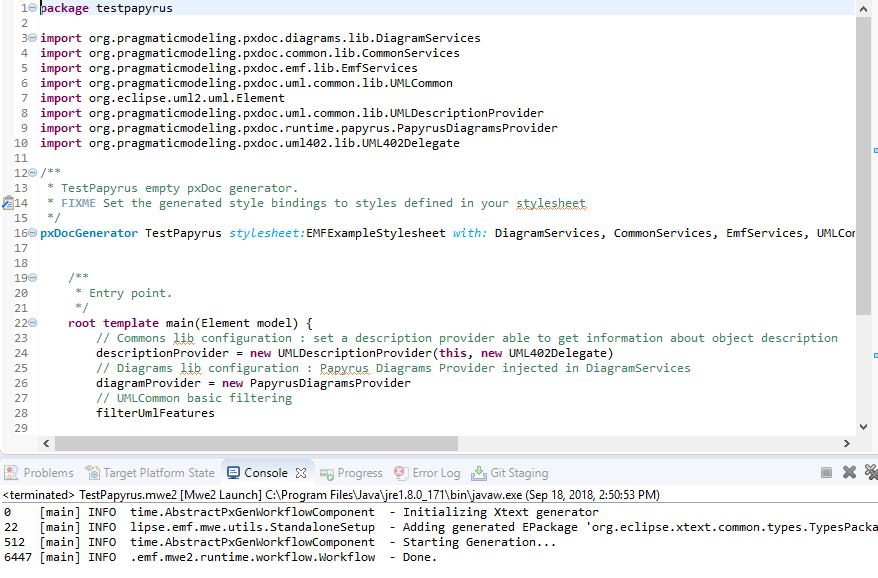
These errors are automatically solved with the second step of the project creation:

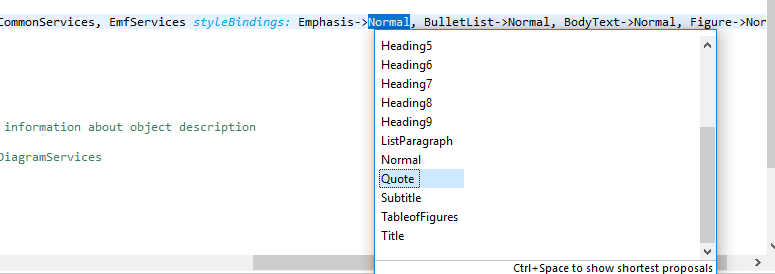
If you included the Common Libraries, your last step is to properly bind the variable styles from the modules with the chosen stylesheet: use CTRL-SPACE to get all available styles (from the stylesheet) suggested.
Your pxDoc generator is ready to use with a Papyrus model.
Do not hesitate to go through the provided examples and the Common Libraries documentation to learn quickly how to rule with pxDoc!
Launching the generation
To test or launch your generator,:
- select Debug As or Run As -> Eclipse Application.
In Debug mode, the modifications made to your generator are automatically taken into account, so you just need to re-launch the generation in the 2nd Eclipse to see the result.
- Import your source model, data... in this 2nd Eclipse
- To enable the pxDoc menu, right click on a relevant object of this source (according to the command object defined in the root template of your Generator).
The launching wizard will pop up
.
Use the pxDoc common libs in your generator
If you did not uncheck the Use pxDoc libs in the project creation wizard, you can take benefits of the pxDoc Common Libraries.
With these libraries, your generator is ready to:
- Use the Papyrus Description Provider to benefits from CommonServices and EmfServices to include the description of an element (incl. its icon, attributes...) in several formats (table, bullet point)
- Query and include Papyrus diagrams
- Use the templates of the UMLCommon Module dedicated to each type of element (class, interface, component...). You can import the library in your workspace from the Plug-ins view: /org.pragmaticmodeling.pxdoc.uml.common.lib
If you unchecked the Use pxDoc libs checkbox, you can of course import manually the Modules and plugins. Do not forget to add the relevant dependencies to the MANIFEST.MF of the project.
Query and include Papyrus Diagrams
Below are some sample queries you can use:
									// diagrams owned by the 'model' object
								var List<Diagram> ownedDiagrams = queryDiagrams(model).execute;

								// all diagrams owned directly and indirectly by the 'model' object
								var List<Diagram> allOwnedDiagrams = queryDiagrams(model).searchNested.execute;

								// diagrams owned by the 'model' object, with some content
								var List<Diagram> ownedNonEmptyDiagrams = queryDiagrams(model).notEmpty.execute;

								// look for a diagram owned by 'model' and named 'A diagram name'
								var List<Diagram> diagramsByName = queryDiagrams(model).name('A diagram name').execute;

								// look for a diagram owned by 'model' with name staring with 'ABC'
								var List<Diagram> diagramsByNameStartingWith = queryDiagrams(model).nameStartsWith('ABC').execute;

								// diagrams by type
								var List<Diagram> diagramsByType_CDB = queryDiagrams(model).type('CDB').execute;

								// diagrams with type 'CDB' and name starting with 'MyString'
								var List<Diagram> cdbStartingWithMyString = queryDiagrams(model).type('CDB').nameStartsWith('MyString').
									execute;
To include the diagrams:
								// Your defined query
								var List<Diagram> myDiagramQueryName = queryDiagrams(model).execute;

								// Use the template from the DiagramsService module
								// (as you can see, you can apply a template directly on a List of objects: no need to define explicitly a loop!)
								apply includeDiagram(myDiagramQueryName)

								// OR insert the diagram image by yourself...
								for (diagram : myDiagrams) {

						// use the pxdoc 'image' keyword with diagram image file path
						// stored in the 'path' diagram attribute (was 'data' in pxDoc v1.1 and previous).
						image path:diagram.path
						// add a title with a style
						#Figure keepWithNext align:center {
						diagram.name
						}
						// include diagram documentation if any
						if (!diagram.documentation.empty) {
							#BodyText {diagram.documentation}
						}
					}
And you can get the source diagram object to extract some information from it (get the semantic elements...):
					for (diagram : myDiagrams) {
						var myDiagramObject=diagram.diagramObject as DDiagram

						// Do whatever you need with the object...
					}
Find the project on GitLab
You can find the source project on GitLab: https://gitlab.com/pxdoc/pxdoc-papyrus.
Get support on pxDoc
Read the documentation on www.pxdoc.fr.

